This guide will show you the core parts needed to build a screen that follows MVI, the order of each part, and how to assemble each one.
To begin, let’s make a list of the bare minimum parts involved in MVI.
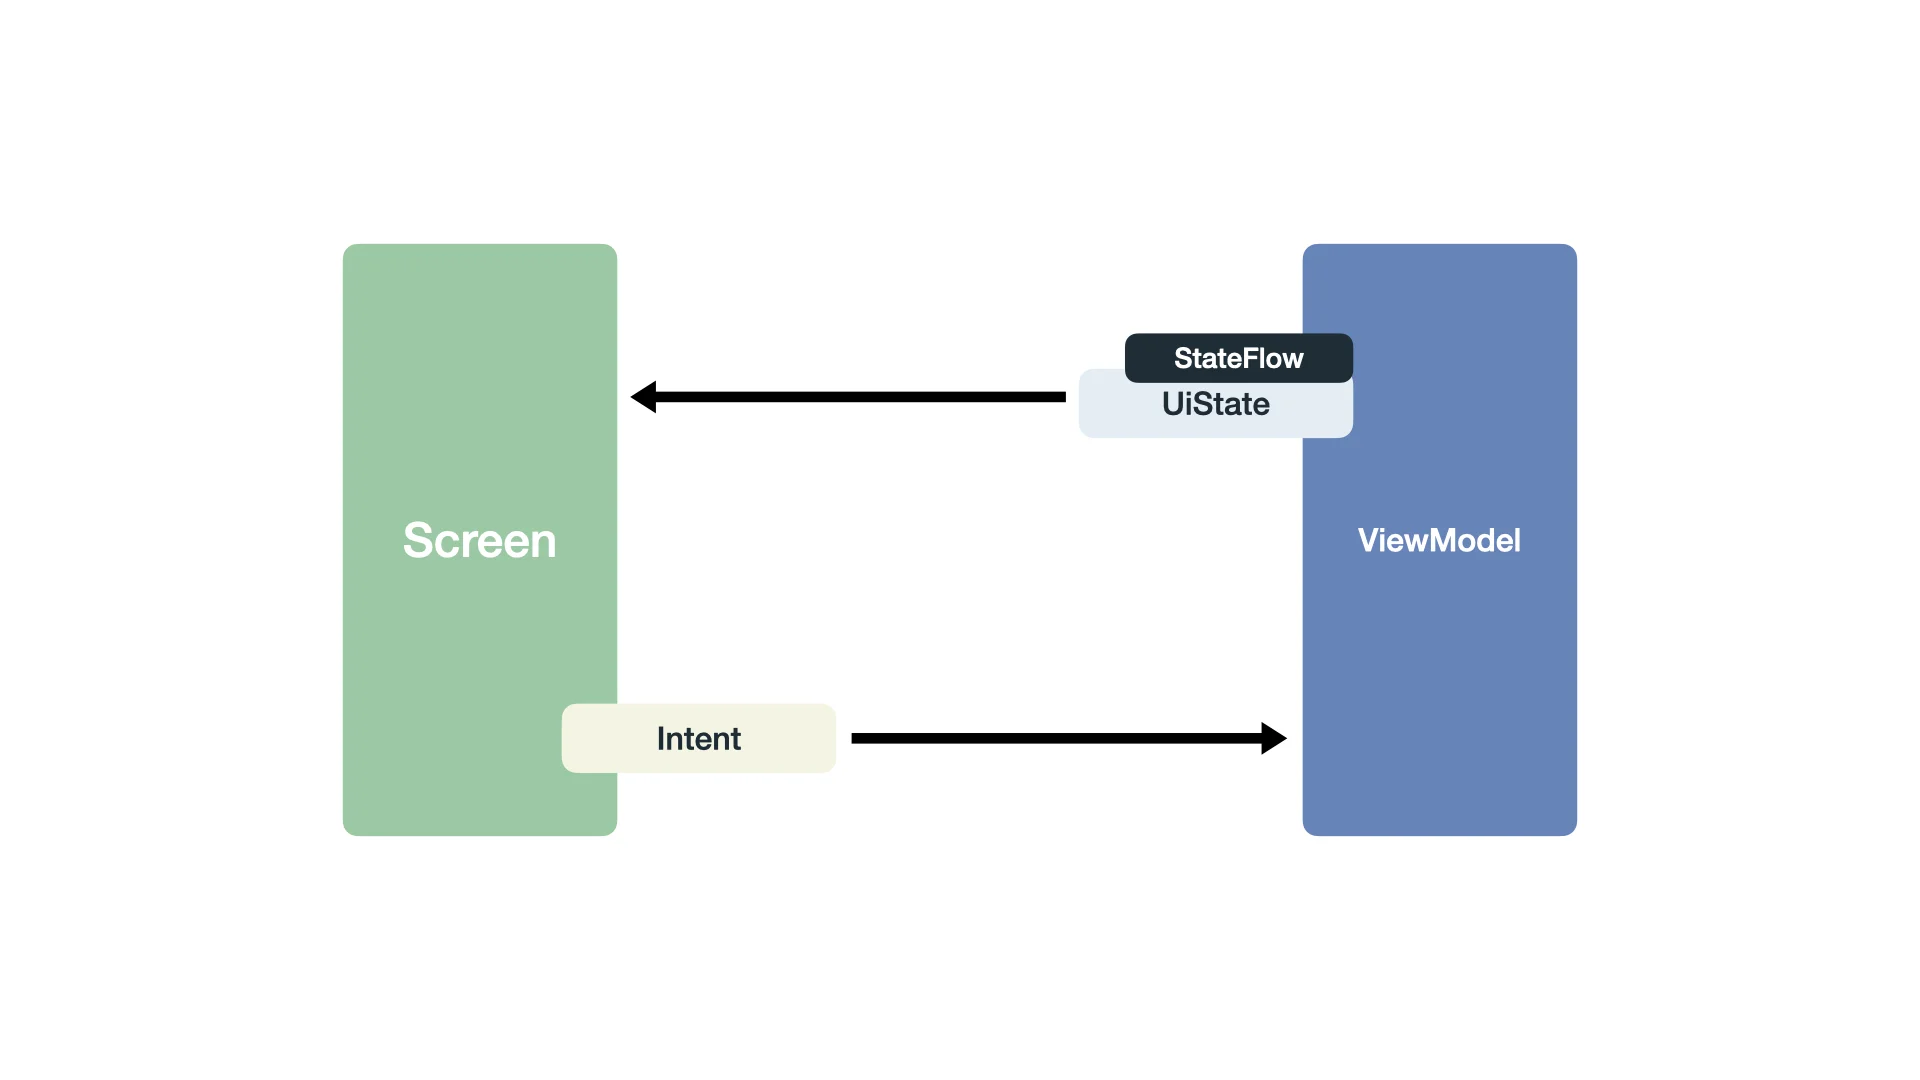
- A @Composable for the Screen.
- The ViewModel associated with the Screen.
- A data class to define the UI State.
- A sealed interface to define the actions offered by the screen.
- A way to notify the screen that the UI must be updated: StateFlow.
Let’s take the Articles screen from the Kesi Android app as an example. From here, we’ll define the parts I mentioned previously.

Step 1 – Create a new Android project
Open Android Studio and choose “New Project”, selecting the “Empty Activity” template. Then, name the project “MVI Core”.
Leave the rest with the defaults: Minimum SDK as 24 and the build configuration language as Kotlin DSL.

Step 2 – Create files and folder structure
Now, create the package com.kesicollection.mvicore.feature.article and add the following files:
- ArticlesContract.kt
- ArticlesViewModel.kt
- ArticlesScreen.kt
Step 3 – Start with the Contract
Open the ArticlesContract.kt file to create the data class defining the UI State and the sealed interface for the actions the screen can trigger.

Now, let’s analyze the screen again. We’ll notice it displays a list. Since this list will be loaded from a source, it implies a loading state and the potential for errors.
The actions the screen will trigger are fetching the articles and bookmarking a specific article.
Step 4 – Assemble the ViewModel
Now, open ArticlesViewModel.kt to define two key components: the StateFlow variable that the screen will observe to render its UI, and the method it will invoke when an action is triggered.

Remember, we’re focusing on a step-by-step approach, providing you with the building blocks. If you feel overwhelmed by code you haven’t seen before, or if parts simply don’t connect in your head yet, that’s perfectly fine! It’s just like LEGOs—sometimes you don’t fully grasp it until you connect all the pieces together.
Anyway, I’ll provide AI prompts at the end about the technical parts. You can use these to start a chat with an infinitely patient “person” who will answer as much as you need, instead of just getting a single, potentially insufficient definition.
Step 5 – Assemble the Screen
Finally, open ArticlesScreen.kt to compose a simple Composable that uses what we have assembled so far.

Again, remember that this guide’s focus is to provide you with the building blocks of MVI and show how they all connect. The Compose code I used is less than performant, and I wouldn’t suggest using it in a production environment. However, that’s the beauty of MVI: that code will be the only thing you’ll need to change, as everything else is now seamlessly connected!
These are 5 steps on how to integrate MVI into your project, but there’s more to it because this is only the bare bones of MVI. With MVI, you’ll encounter concepts like Reducers, Processors, Side Effects, and much more. However, this post serves as the foundation to build upon for future discussions.
Use these AI prompts to dig deeper into the topics mentioned in this post and grasp the concepts at your own rhythm.
data class vs data object
TODO
Tech Specifications
Processor:
Quad-core 2.5 GHz
Memory:
8 GB RAM
Storage:
256 GB SSD
Display:
15.6″ Full HD
Graphics:
Integrated Intel UHD
Our Review
The XYZ Smartwatch is a well-rounded wearable offering excellent battery life, comprehensive health tracking, and a sleek design at an affordable price. While it lacks the extensive app ecosystem of some competitors and could improve in build quality, it remains a strong choice for those seeking a reliable and stylish smartwatch.
Pros
+ Excellent Battery Life
+ Health Tracking
+ Water-Resistant
Cons
– Average Build Quality
– Occasional Connectivity Issues